Killclip Tips
Tips on how to get the best from Killclip
Killclip - Keep it Clean
Killclip is designed to be a product to be enjoyed by both the individual using it and the wider Destiny community who may view content generated by Killclip. Any user found to have used Killclip as part of an attempt to harass or humilate other Destiny players may lose access to Killclip.
Bungie.net Privacy Settings
For Killclip to work fully, it needs to be able to view your full game history. Specifically, the 'Show my Destiny game Activity feed on Bungie.net' and 'Show my progression' settings need to be enabled. These are enabled by default so you don't need to do anything if you've never changed your privacy settings.
Killclip Ownership
Every download of Killclip is personalised and will only work fully for the user who signed in to download it. If you wish to use your own copy of Killclip to scan someone else's videos, or you give your videos for someone else to scan, this will not work.
Full Compatibility
Killclip supports and has been tested with videos captured from all versions of Destiny 2 (Windows, Xbox and Playstation), all resolutions (including 5120x1440 superwide), all combinations of video modes (HDR, VRR) and all variations of HUD sizes and colour blind settings.
Killclip Files
Killclip's file format is '.killclip'. A Killclip file contains various information about the Destiny PVP game that was scanned to generate it. A single video may generate multiple Killclip files, one per Destiny PVP game, with each Killclip file sharing the same name as the video followed by a game number. Killclip files are saved in the same folder as the video file that was scanned and shouldn't be moved to a different folder away from the video file or renamed. Killclips with an '_xx' in the name are used to mark videos with no valid PVP game.
Standalone Player
Killclip files can be opened directly without opening the full Killclip application if you just wish to quickly watch a game.
Your Videos
Killclip leaves your videos completely untouched - it doesn't modify, move or delete them at any time. If you decide to move your videos to a new location after they have been scanned, Killclip will attempt to re-find them in its list of known locations, and if it can't, it will display a small message to let you know you need to re-add them.
MP4
Killclip currently only supports the .mp4 video format. MP4s can be exported by most capture platforms including ShadowPlay, ReLive, OBS, PlayStation and Xbox.
Bitrates
Killclip works best with high quality captures with a good bitrate. The lower the bitrate, the blurier the video will be, and the lower Killclip's accuracy will be. Always use videos captured directly from source for best results. Videos downloaded from Twitch will generally not work well due to having a low bitrate.
HDR
Killclip supports both HDR and non-HDR videos, but we generally recommend recording non-HDR videos for slightly better scanning accuracy. HDR videos have a more compressed rgb colour space which can make certain text harder to detect. Also, viewing HDR videos on an SDR display will appear 'blown out' with some media players.
Steam Recording
We would not curently recommend using Steam Recording to capture your gameplay videos - from our tests, even on the highest bitrate setting, the video quality is poor. We recommend using Shadowplay or ReLive instead.
'No Game Found'
If after scanning you see 'No Game Found', Killclip was unable to detect a Destiny 2 PVP game involving the player who downloaded Killclip.
'No PGCR Found'
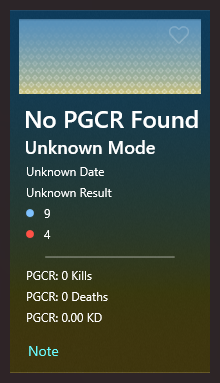
If after scanning you see 'No PGCR Found', Killclip was unable to match the video with a specific Destiny 2 game and its PGCR (Post Game Carnage Report). There can be a few reasons for this:
- The PGCR has not been processed by Bungie yet. Sometimes a PGCR can take several minutes or longer to be processed by Bungie once a game has finished. If the scan is performed too quickly after a game, the PGCR might not exist yet.
- Killclip couldn't match the video date with the PGCR date. Killclip checks all games within 24 hours of the video date - using either the 'media creation' date, modified or creation date (whichever is earliest). The media creation date is the most reliable (once it's set, it never changes), but some capture software such as OBS don't set this.
- In some rare instances, older videos might feature games with players who have all changed their name since the game took place. In such cases, we can't use their names to find the PGCR.
Old Destiny Names
For a successful scan, Killclip needs to know your Destiny name. Killclip will automatically track your current Destiny name and future ones should you change it, but we cannot currently track old Destiny names. If you wish to scan gameplay videos with an old Destiny name, you must first add it via the settings screen.
Fireteam Names
If you play in a fireteam with someone who has a very similar Destiny name to yourself - for example your name might be 'KILLER' while your fireteam friend's name might be 'K1LLER', this will potentially affect scan accuracy results.
Short Names
Short player names, especially those comprised of symbols, may result in a lower scan accuracy. For example, a player name such as ':)' may prove difficult for Killclip to detect.
Missed Kills
Killclip is unable to detect certain kills or deaths which do not appear in the killfeed. These include deaths to misadventure, and kills of the Cabal turrets in Iron Banner.
Scan Speeds
Killclip scan speeds depend primarily on the resolution of the video that is being scanned - the larger the total number of pixels, the longer the scan speed. A video resolution of 2560x1440 is recommended. When scanning multiple games in one video, games after the first one will usually be quicker due to information that is learnt during the first game scan.
Background Scanning
When the 'AutoQueue' and 'AutoScan' settings are enabled, you can leave Killclip running in the background and it will automatically find and scan any new videos. To find new videos it will use the known locations of videos that have been added manually before. There's also a setting to only scan new videos when Destiny 2 isn't running to prevent Destiny 2's performance being affected.
Scan Indicator
When a Killclip scan is in progress, a blue dot will appear next to the 'Videos' menu row on the left-hand side so you always know when your computer is using extra resources.

Killclip Search
On the Killclips page, the search bar allows you to narrow down the Killclips that are displayed/exported. Available search terms include weapon names, weapon types, map names and player names. For seach terms with spaces, enclose the search term in double speech marks. Here's some example searches:
- Kills
- Thorn Kills
- "Sniper Rifle" Headshot Kills
- "Sniper Rifle" "Hand Cannon" Headshot Kills
- "The Last Word" Deaths "Gernader Jake"
Killclip Coverage Bar
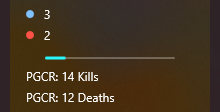
On the Killclips page, each Killclip has a blue bar - this shows the percentage of the game that was recorded and is available to view. We recommend recording and scanning full games when possible.
Coloured Borders
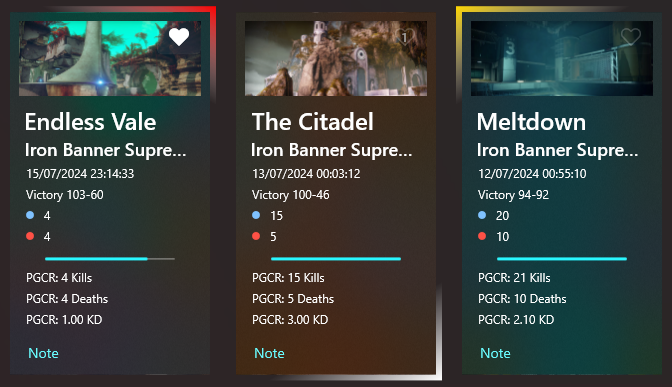
If a Killclip has a gold border, it means you were the MVP for that game - you had the most kills of all players and you won the game. If a Killclip has a red border it means you've marked it as a favourite, and a white border signifies that a note has been written for this Killclip.
Game History Grouping
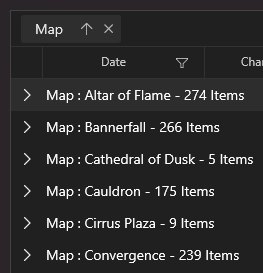
If you drag a column header into the blank row at the top of game history grid, you can group the data by that column. You can drag multiple column headers for nested groupings.
Weapon Select
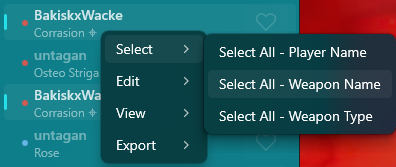
If you wish to view only a subset of kills that's related to a particular weapon (for example, all sniper headshot kills, or all Jötunn deaths), right clicking a row in the kills/deaths list in the left-hand pane shows a menu pop-up which allows you select a subset of kills involving that weapon.
Player Select
If you wish to view only a subset of kills that's related to a particular player, right clicking a row in the kills/deaths list in the left-hand pane shows a menu pop-up which allows you select a subset of kills involving that player.

Favourites Select
If you have set a kill/death in the left hand kill list as a favourite, you can play just your favourites by selecting the favourite button next to the Autoplay toggle.

Multi Select
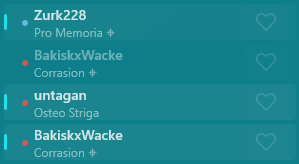
By holding down Ctrl or Shift while selecting names in the kill list, you can select mutiple rows at once - only these kills and deaths will then be played, with everything else greyed out
Killclip Editing
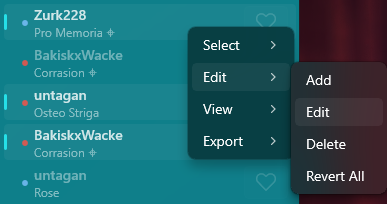
If your Killclip results need tweaking slightly, right clicking a player name in the kills/deaths list in the left-hand pane shows a menu pop-up which allows you to edit kills/deaths, add new ones or delete existing ones. You can also revert to the original Killclip if you wish to discard your changes.
PGCR Sorting
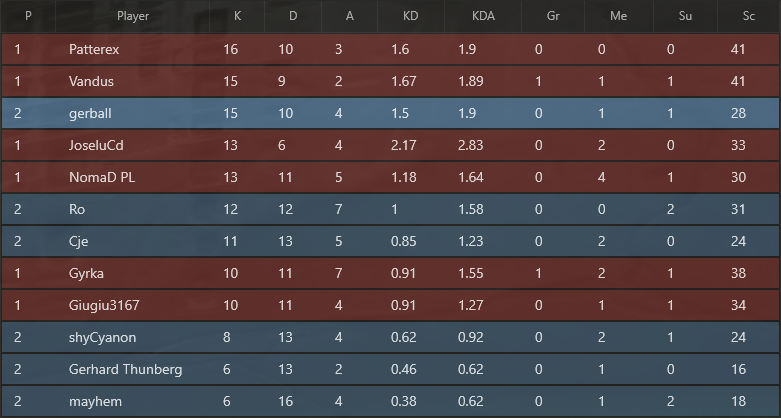
Select a column header to sort the in-video PGCR by kills, deaths etc. Hold down shift while selecting a column header to sort all the players regardless of team.
Killclip Ordering
If you wish to change the order of Killclips for viewing or export, you can do so by dragging the killclips to a new position. Killclips furthest to the top left will be shown first.
Scan Ordering
If you have a lot of videos in the scan queue and you wish to change the queue order of the videos waiting to be scanned, you can do so by dragging the videos to a new position. Videos furthest to the top left will be scanned first.